Here’s how to make tissue paper decoupage pumpkins to take your fall decor in a fun new direction…
Tissue Paper Decoupage Pumpkins, For Gourdness Sake
Want a quick, easy, minimal-supply way to decorate some adorable, on-trend pumpkins this fall? You know we’ve got you. Grab some tissue paper and glue and get to sticking. Here’s how to make tissue paper decoupage pumpkins.


What you’ll need:
• Tissue paper in your favourite Halloween colours (you can grab individual colours or multi-colour packs—and don’t be afraid to use patterns!)
• Real or artificial white pumpkins
• Scissors
• Mod Podge (we used the matte finish) or white glue mixed with an equal amount of water
• Paintbrush or foam brush

Step 1: Cut out your shapes
Start by cutting different shapes and sizes from your tissue paper. You can make:
• Basic shapes: circles, squares, triangles, rectangles, zigzags, strips
• Shapes from the sky: rainbow arcs, clouds, stars and starbursts, lightning bolts, moons, comets
• Natural shapes: leaves, grasses, fruits, flowers, branches, berries, puddles, stones
• Art-inspired shapes: Do an image search for “shapes” plus an Henri Matisse or Memphis design.
Because tissue paper tears easily, cut one or just a few shapes at a time. If you want multiples, don’t stack more than five sheets.

Step 2: Decoupage tissue paper onto your pumpkin
For each shape you want to add, follow these three super-simple steps:
• Paint a little Mod Podge onto your pumpkin in the spot you want the shape. Be sure to make the spot of Mod Podge bigger than the tissue paper.
• Starting on one corner or edge of the shape, gently press the tissue paper onto the Mod Podge, smoothing as you go.
• Just as gently, brush another layer of Mod Podge over the entire shape, using the brush or your fingers to push out bubbles in the paper.
• Keep adding shapes to your tissue paper pumpkin.
Some pro tips from Hallmark’s cut-paper collage expert, Lynn Giunta:
• Don’t throw away your scraps—the space around the shape you cut might be more interesting than the shape itself.
• Speaking of which—stack two or three contrasting or complementary colours and cut a shape. Then use that shape and the outline in two different colours.
• Save your tissue scraps for another cut-paper collage project.

Step 3: Give the pumpkin one more coat
After all the shapes are in place, go over the whole tissue paper decoupage pumpkin with one more coat of Mod Podge. Let it dry and your pumpkin is ready!

Some fun things to try:
• Layer different colours over each other to make new or darker colours.
• Use patterned tissue paper for more contrast.
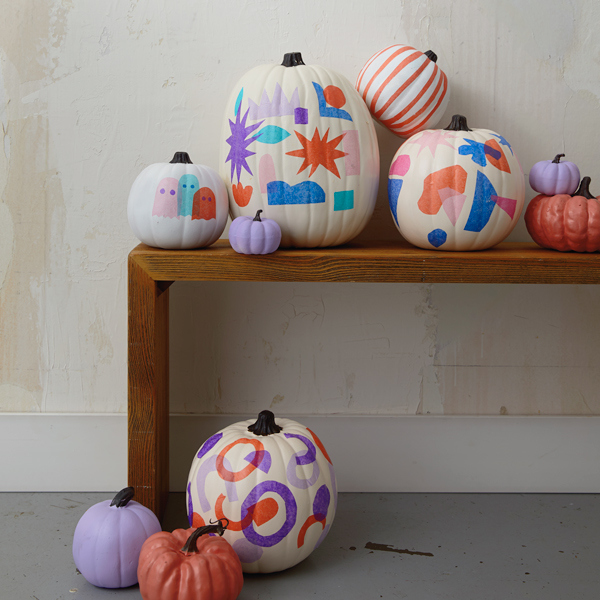
• Cover a whole pumpkin in abstract shapes or create a simple image on the front.
• Use the same batch of colours to create a multiple pumpkin display.
Pro tip: Mod Podge makes a special formula for outdoor use—handy if your pumpkin will be sitting unprotected on a stoop.
Want to level up your Halloween display? Coordinate your colours and try easy painted pumpkins. And use your extra tissue paper to make these adorable treat bags.