Easy DIY Easter Decorations to Welcome Spring

By Trish Berrong on March 9th, 2021
Easter decor 1

Have we ever been this ready for spring? These three adorable Easter decorations from Hallmark designer/illustrator/DIY-er Kelly C. are easy, kid-friendly DIYs to brighten up doors, yards and tables.

Easter decor 1
#

Easter Bunnies at the Door

Easter decor 7

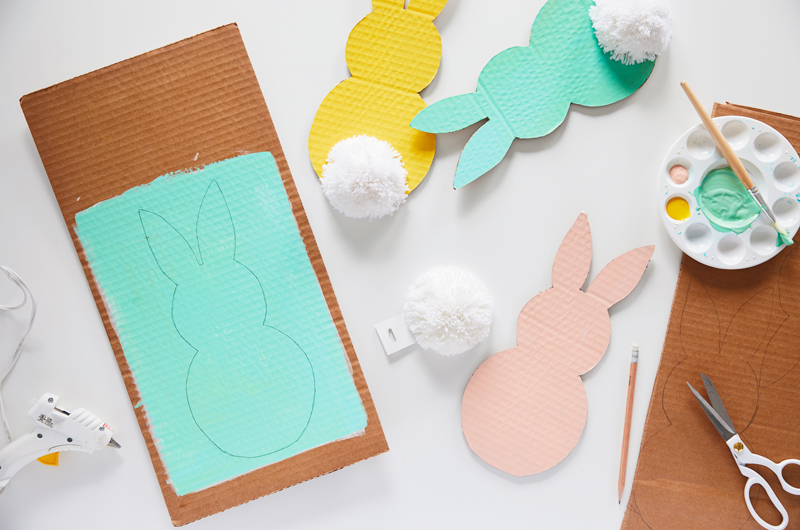
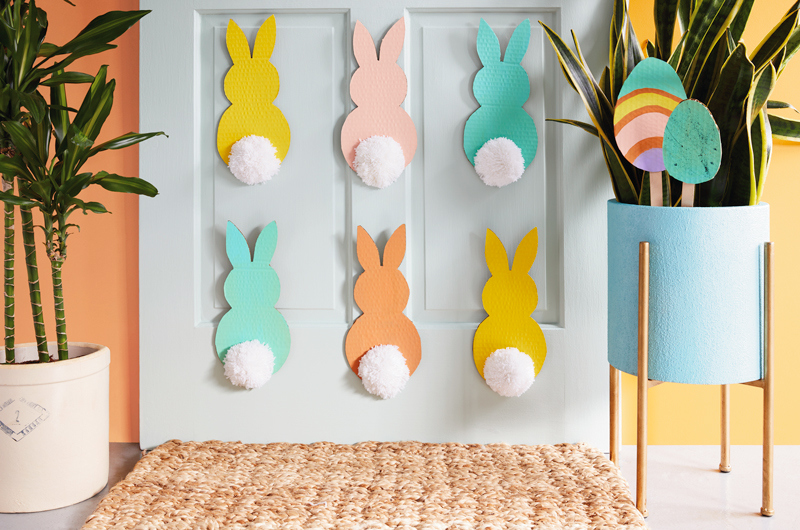
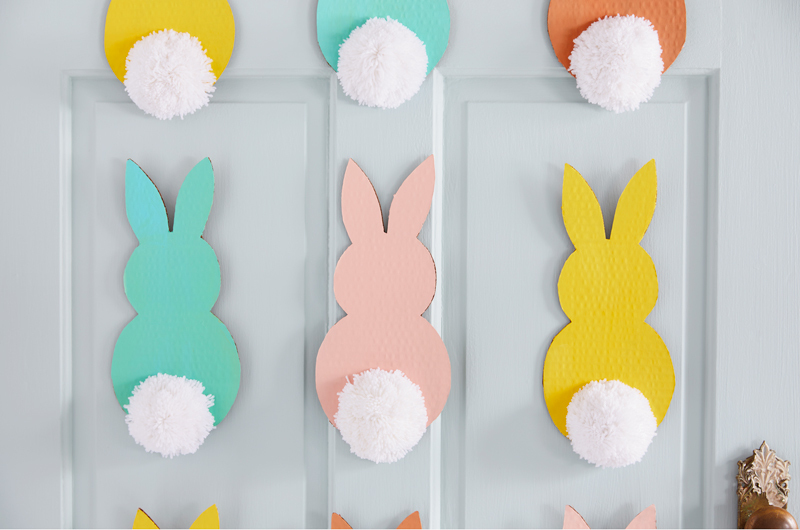
We found inspiration for this Easter bunny in a white pom-pom gift bow and a bunny-butt design. All it takes to cover your front door with bunnies is cardboard, paint and pom-poms.

Easter Bunnies at the Door Supplies

  • Large cardboard boxes or chipboard cereal boxes
  • Primer or flat white acrylic paint
  • Acrylic paint in 3–4 pastel colours
  • White pom-pom gift bows
  • Craft knife and cutting board
  • Scissors
  • Paint Brushes
  • Pencil
  • Compass—or plates, cups or bowls to trace
  • Hot glue and glue gun
  • Removable poster tape, mounting strips or putty
Easter decor 6

Instructions

  • Decide how many Easter bunnies you want on your door and estimate how tall they should be.
  • Cut rectangles of cardboard a little taller and wider than you’re going to make your bunnies. Paint them first with primer, then with different pastel colours.
  • To make the first bunny: On one piece of cardboard, draw (or trace) one circle for the bottom and a smaller circle slightly overlapping it for the head. Then sketch the ears—don’t worry about getting them perfect or matching exactly.
  • Cut the bunny out with a craft knife and trace it on the other pieces of painted cardboard to make as many Easter bunnies as you need. (We went with three across and four down on our door.)
  • Glue the pom-poms to the bunny butts.
  • Use the poster tape to attach the Easter bunnies in rows on your front door.
Easter decor 2

More tips

  • Cover your front door with white butcher paper before attaching the bunnies.
  • Just make one giant bunny and use multiple pom-poms for the tail.
  • Make smaller bunnies to attach to gift boxes and bags.
#

Easter Egg Yard Decorations

Easter decor 5

These are fun to make with kiddos and “hide” in friends’ and families’ front yards. Could you do the same thing with the Easter bunnies above? We would not stop you.

Easter Egg Yard Decorations Supplies

  • Chipboard cereal boxes
  • Primer or flat white acrylic paint
  • Acrylic paint in 3–4 pastel colours
  • FREE downloadable egg template
  • Craft sticks
  • Scissors
  • Craft knife and cutting board
  • Paint brushes
  • Pencil
  • Hot glue and glue gun
Easter decor 4

Instructions

  • Cut the cereal boxes apart and paint them with primer (or white paint). You can just do one side or the front and back.
  • Print out the FREE downloadable egg template. Cut out eggs and trace them onto the primed chipboard.
  • Use the pastel paints to decorate the eggs.
  • Cut the eggs out with the craft knife. Hot-glue a craft stick to the bottom on the back of each one.
  • Stick them in the ground in the front yard or in planters, flower boxes or gardens.
  • Cut rectangles of cardboard a little taller and wider than you’re going to make your bunnies. Paint them first with primer, then with different pastel colours.
  • Stick them in the ground alone or in groups.
Easter decor 3

More tips

  • Play with how you group the eggs—and try putting craft sticks on a side instead of the bottom so they lay different ways.
  • Stick them in planters on your front porch or patio.
  • Put eggs all over your block for a no-contact neighbourhood Easter egg hunt. (Get folks to take pictures instead of taking the eggs.)
  • Instead of craft sticks, poke little holes in the tops and use fishing line to hang the eggs from tree branches.
#

Spring Flower Vases

Easter decor 9

Add a little baking powder to some acrylic paint and you can make any glass jar or ceramic container look like it’s made of terra cotta. These are just right for making Easter brunch or dinner table decorations or dropping spring flowers off for friends.

Spring Flower Vase Supplies

  • Glass or ceramic containers
  • Acrylic paint
  • Baking powder
  • Paint brushes (don’t use your good ones for this project)
  • Bowl or plate for mixing
  • Plastic spoons or craft sticks (for stirring)
Easter decor 8

Instructions

  • Start by making sure your containers are squeaky clean and sticker-free.
  • Mix the baking powder into the paint. We went with a 1:4 powder to paint ratio, but you can make yours thicker if you’d like. When you let it sit for a few minutes, it gets fluffy—and that texture is fun to work with when you start painting.
  • Paint the first layer on each container and let it dry completely. Really, absolutely completely.
  • When you add the second layer to your perfectly dry first layer, you can play around with texture and thickness.

More tips

  • Make vases in different sizes and colours and combine them to make your display or table-scape more interesting.
  • Combine your new containers with our pop-up cards that look like plants, Easter bunny salt and pepper shakers, bunny planter and your own Easter decorations.
  • Don’t worry about buying fancy flowers: Large vases can carry budding branches, medium bottles are perfect for daffodils and tiny ones can hold clovers and pansies. Add our bunny planter for bonus Easter cuteness.