DIY spring wreath
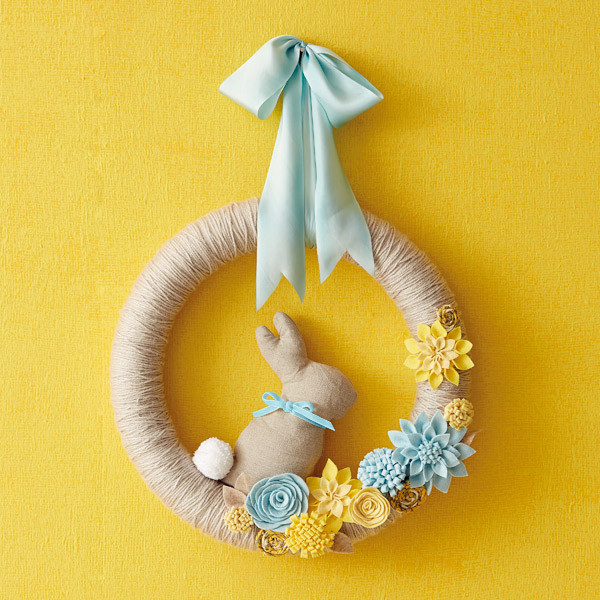
Tired of Old Man Winter? Show him the door with a delightful homemade spring wreath you can make in an afternoon. This yarn-wrapped wreath with felt flower attachments is sure to brighten your spring (and your spirits). In fact, it’s so lovely you might be tempted to leave it up all year. (Well, maybe just until Mother’s Day!). Add the optional bunny to get a hop on your Easter decorating!
Crafter level: Skilled
Time needed: 3 hours
Download and print the free Bunny and Flower templates before you start.
Ingredients
- For wreath, felt and fabric flowers
- Foam wreath form
- 1 Skein yarn
- Double-sided tape
- Felt (as many colours as you’d like)
- Fabric strips
- Low-temp hot glue gun
- Scissors
- For bunny addition
- ¼ yd. Fabric of your choice
- Thread to match
- Needle
- Stuffing
- White pom-pom for tail
- Sewing machine
- Scissors
- ½ yd. Ribbon for bunny’s bow
Directions
- You’ll start with your foam wreath form, and yarn. Start on what will become the back side of your wreath and add a strip of double-sided tape. Tie the tail of your yarn around the wreath tightly. This will keep it from sliding around while you wrap your wreath.
- Continue to wrap your yarn around and around the wreath form, making sure to leave no foam showing. Tip: You can use more than one colour of yarn to make stripes around your wreath. Wrap evenly around the entire wreath form. When you get to the end, tie it off with another snug knot.
- Add your felt flowers, as many as you’d like, in whatever configuration you choose. The instructions for each type of flower are included below and in the printable flower template.
- An optional bunny template is also included. To make the bunny, print and cut out the template, place on fabric folded right sides together, and cut out the 2 fabric pieces. Sew fabric pieces together using a standard ¼-inch inseam. Allow a space along the bottom for turning and stuffing. Clip curves, especially around ears for easier turning. Turn right side out. Stuff bunny and hand stitch opening closed. Attach the bunny with a line of hot glue along bottom of wreath, behind flowers.
- FELT CHRYSANTHEMUMS
- Print provided templates and use scissors to cut felt pieces to size around the border. Tip: For bigger flowers, just make length longer, and then when you roll up the flower, it will get larger.
- Fold in half (where the dotted line as shown) and run a bead of hot glue down the long side and press together.
- Run another bead of hot glue along the bottom edge and roll flower closed.
- FELT DAHLIAS
- Print provided templates and use scissors to cut felt pieces to size. Tip: The sharper the scissors, the easier it will be to cut through felt.
- Drop a bead of hot glue at the fold line of each petal and fold petal in half, pressing together to give the petals their shape.
- Start with the large petals and glue down evenly around the edge of the backer piece. Then layer the medium petals down. Finish by adding the layer of the small petals.
- FELT ROSES
- Print provided template and use scissors to cut felt pieces to size around the border. Two sizes are provided so you can add variety to your project. For fuller roses, cut out additional petals using the section of the templates indicated with a dotted line.
- Start at the centre and run small drops of hot glue around the straight edge, roll tightly and hold for a few seconds while the glue dries.
- FELT LEAVES
- Print the provided templates, then use scissors to cut out leaf shapes from your felt. Use the leaves around your flowers to fill in areas and add a special touch. Tip: Use pinking shears for a fun look.
- FABRIC ROSETTES
- Cut strips of your favourite fabrics 1 inch wide and 8 inch long. Tip: Pattern fabrics or stripes are fun for this, because they look totally different after being twisted.
- Start at one end and begin twisting your fabric strip. Tip: Try to tuck in the raw edges as you go for a more finished look. Every inch or so drop a bead of hot glue to hold your twist together. Continue to twist your fabric and glue down to the edge of the previously glued part. A circle will begin to form. Tip: The bigger you want your rosette, the longer the piece of fabric you can use.
- When you get to the end, take the last tail of fabric and tuck around the back. Glue end down to the ‘wrong’ side of your rosette.